Home > Arts > Artists > D > Frank Dadd
Colonel Plumers Gallant Attempt to Relieve Mafeking from the North, after F. J

![]()
Wall Art and Photo Gifts from Fine Art Finder
Colonel Plumers Gallant Attempt to Relieve Mafeking from the North, after F. J
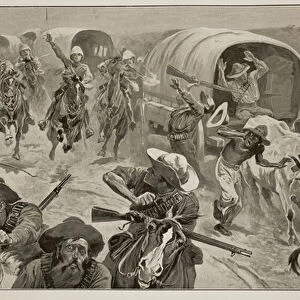
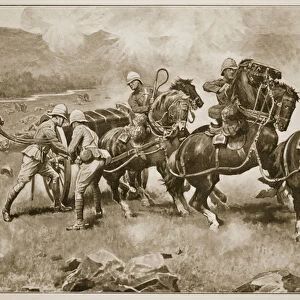
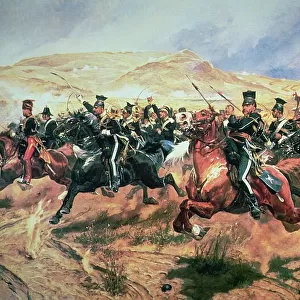
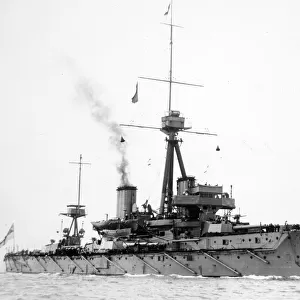
STC363446 Colonel Plumers Gallant Attempt to Relieve Mafeking from the North, after F.J. Mackenzie (litho) by Dadd, Frank (1851-1929); Private Collection; (add.info.: Colonel (later Lieutenant-General) Herbert C.O. Plumer (1857-1932); The Siege of Mafeking lasted 217 days during the Second Boer War (1899-1902), from October 1899 to May 1900; ); The Stapleton Collection; English, out of copyright
Media ID 22376110
© The Stapleton Collection / Bridgeman Images
2nd Boer War Advance Advancing Aiming Boers British Army Firing Fleeing Lieutenant Colonel Rifles Shot Skirmish Track Train Tracks Dying Mafikeng
FEATURES IN THESE COLLECTIONS
> Africa
> South Africa
> Related Images
> Animals
> Farm
> Related Images
> Arts
> Artists
> D
> Frank Dadd
> Fine Art Finder
> Artists
> Frank Dadd
> Fine Art Finder
> Artists
> Richard Caton II (after) Woodville
> Fine Art Finder
> War & Military Scenes: 20th Century
> Historic
> Battles
> Related Images
> Transportation
> Trains
Colonel Plumer's Gallant Attempt to Relieve Mafeking from the North - A Glimpse into Heroism and Sacrifice
EDITORS COMMENTS
. In this photo print, we are transported back in time to witness a pivotal moment during the Second Boer War. The image depicts Colonel Herbert C. O. Plumer, later Lieutenant-General, leading a valiant charge against enemy forces as he attempts to relieve the besieged town of Mafeking from the north. With unwavering determination etched on his face, Colonel Plumer stands tall atop his horse, commanding his troops with strategic precision. Surrounding him is an intense skirmish unfolding on the battlefield; British soldiers engage in fierce combat with their rifles aimed at unseen adversaries. The chaos of war is palpable as gunshots echo through the air and horses gallop across train tracks that cut through this unforgiving landscape. Amidst it all, lives hang in balance – some fleeing for safety while others fall victim to relentless gunfire. This historic photograph encapsulates not only the bravery and resilience of these soldiers but also serves as a poignant reminder of the human cost paid during times of conflict. It symbolizes both hope and despair, capturing moments where life and death intertwine amidst the clash between opposing forces. As we gaze upon this remarkable scene frozen in time, let us honor those who fought selflessly for their cause and reflect upon how such acts shape our understanding of history today.
MADE IN THE USA
Safe Shipping with 30 Day Money Back Guarantee
FREE PERSONALISATION*
We are proud to offer a range of customisation features including Personalised Captions, Color Filters and Picture Zoom Tools
SECURE PAYMENTS
We happily accept a wide range of payment options so you can pay for the things you need in the way that is most convenient for you
* Options may vary by product and licensing agreement. Zoomed Pictures can be adjusted in the Cart.