Home > Africa > South Africa > Related Images
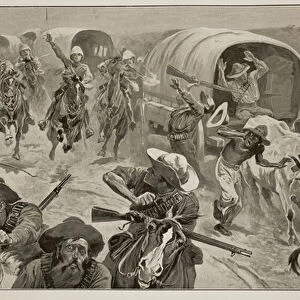
The Battle of Colenso - The last desperate attempt to save the guns of the 14th

![]()
Wall Art and Photo Gifts from Fine Art Finder
The Battle of Colenso - The last desperate attempt to save the guns of the 14th
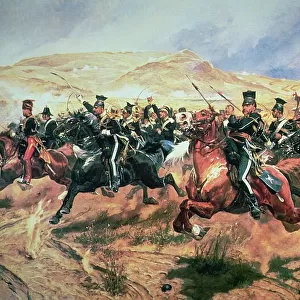
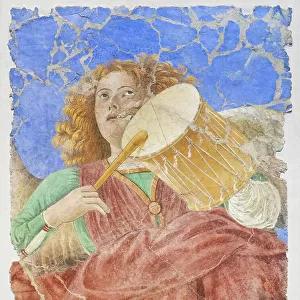
STC363461 The Battle of Colenso - The last desperate attempt to save the guns of the 14th and 66th batteries, 1900 (litho) by Paget, Sidney (1860-1908); Private Collection; (add.info.: The Battle of Colenso was the third and final battle of the Black Week of the Second Boer War (1899-1902), fought on 15 December 1899; ); The Stapleton Collection; English, out of copyright
Media ID 22376120
© The Stapleton Collection / Bridgeman Images
2nd Boer War British Army Escape Escaping Field Gun Fleeing Natal Pith Helmets
FEATURES IN THESE COLLECTIONS
> Africa
> South Africa
> Related Images
> Animals
> Farm
> Related Images
> Fine Art Finder
> Artists
> Richard Caton II (after) Woodville
> Fine Art Finder
> Artists
> Sidney Paget
> Fine Art Finder
> War & Military Scenes: 20th Century
> Historic
> Battles
> Related Images
The Battle of Colenso - The last desperate attempt to save the guns of the 14th and 66th batteries, 1900
EDITORS COMMENTS
. This print captures a pivotal moment in history during the Battle of Colenso, which marked the final battle of the Black Week in the Second Boer War. Taken by Sidney Paget, this lithograph showcases a scene filled with tension and desperation. In this chaotic image, soldiers wearing pith helmets can be seen desperately trying to save their field guns from falling into enemy hands. The British army finds itself facing defeat as they struggle against an organized Boer force. Fleeing on horseback, cavalry troops race across the battlefield in an attempt to escape imminent danger. The intensity of this historical event is palpable through Paget's skilled depiction. The smoke-filled air adds to the sense of chaos as soldiers fight for survival amidst cannon fire and flying bullets. Horses gallop frantically while military uniforms blend with dust-covered landscapes. This photograph serves as a reminder of both the bravery and tragedy that unfolded during this significant conflict. It immortalizes a critical juncture where victory slipped away from one side and was claimed by another. As we gaze upon this image today, we are transported back to that fateful day in December 1899 when heroes fought valiantly but ultimately succumbed to defeat at Colenso's battlefield in South Africa.
MADE IN THE USA
Safe Shipping with 30 Day Money Back Guarantee
FREE PERSONALISATION*
We are proud to offer a range of customisation features including Personalised Captions, Color Filters and Picture Zoom Tools
SECURE PAYMENTS
We happily accept a wide range of payment options so you can pay for the things you need in the way that is most convenient for you
* Options may vary by product and licensing agreement. Zoomed Pictures can be adjusted in the Cart.